Scope of this Post

If you are hoping to use KeePass on Linux or MacOS, I haven't done it myself, but you might have success using KeePassXC or one of the KeePass packages that has made it into Mac OS X and several Linux distribution software repositories. See this page for download options. Also, there's the option of running KeePass under Mono on your MacOSX/Linux system.
If you use the following steps, you'll be able to access your always-up-to-date password database from all of your devices that you've installed KeePass on.
This post assumes you are comfortable using KeePass Plugins and also browser plugins which make using KeePass extremely convenient. Future posts will cover if you want to be paranoid and trust only KeePass itself and Google.
The most notable links, folder locations, and component names are bolded.
Note that the version of KeePass we'll be using is KeePass2, so don't be afraid when folders or apps talk about KeePass2.
Installing KeePass Program and KeePass Plugins on Your Windows PC

- We want to put the KeePass program on our PC.
- Go to the KeePass downloads page and download the latest installer for KeePass v2.xx.x (not the portable download and not KeePass v1.xx). Do not worry about any mentions of "professional edition"; it does not require any money or registering.
- Run the installer; this installs the KeePass program on your computer. Enabling auto-update is a good idea.
- We want to install the KeeAnywhere plugin for KeePass so that the KeePass program can directly open and modify password databases on Google Drive.
- Choose to download the latest .plgx file from this KeeAnywhere page.
- Place the .plgx file in the KeePass plugins folder on your computer. That folder is probably "C:\Program Files (x86)\KeePass Password Safe 2\Plugins".
- If the KeeAnywhere link above is no longer valid, check the KeePass plugins page for KeeAnywhere, or your "backup and synchronization" plugin of choice.
- You might also want to install an icon downloader plugin, which makes it easy to add icons to your entries.
- Download the latest .plgx file from this KeePass Favicon Downloader page and place it in the KeePass plugins folder.
One-Time Process of Creating a Password Database File and Putting it Google Drive
- Create a new database file locally on your PC.
- In KeePass, create a new database by going to Main Menu → File → New...
- The file name and location you choose is not important, because soon we'll be uploading the file to Google Drive and then deleting the local copy.
- In the "Create Composite Master Key" window...
- You only need to provide a master password.
- Do try to set the master password to a good password. I suggest six random words from the Diceware word list (word list pdf). It's okay for a password to be only lower-case letters if it is long enough (and random enough, but let's talk about that later)
- Clicking the ellipsis button ("•••") will make the master password visible so you can check it.
- It is okay to write down your master password on a slip of paper in your wallet.
- You can always change your master password later.
- Press "OK" once you've put in a master password.
- In the new "Create New Database - Step 2" window...
- General tab...
- You can leave name and description blank.
- Might be useful to fill in default user name
- Security tab: to make the database harder to crack, click the "1 second delay" text to increase the number of key transformation rounds (and thus increase the security of your password database).
- Advanced tab: uncheck the "limit number of history items per entry" option
- Press "OK"
- Do a save (Main Menu → File → Save; Ctrl+S; click the floppy icon).
- The database (.kdbx file) has been created locally on your computer. Close the database in KeePass (Main Menu → File → Close).
- Put the database file in Google Drive
- Go to Google Drive and upload the database. The exact location is not important.
- You can drag-and-drop from Windows File Explorer to the My Drive section of the web page.
- Or, on the Google Drive page, you can right-click and use the "upload files" option.
- In Google Drive, right-click on the database file, and choose to rename it to something like this: YourName.kdbx.kdbx
- The ".kdbx.kdbx" is not a mistake. Currently there is an issue with the iPhone Google Drive app where a single ".kdbx" makes things not work. If you ever want to access your database from an iPhone, use ".kdbx.kdbx".
- In Windows File Explorer, delete the local database file that is on your computer. We don't want to later get confused about which database file we're accessing.
- Be sure to remember/record your Google password outside of your password database, or make sure you can recover your Google password if forgotten. We want to make sure that the process of accessing the password database doesn't require knowledge (passwords) that exist only in the password database.
- Increase the security of your Google account by enabling 2FA.
- If you already have 2FA enabled, then good job.
- If you do not have 2FA enabled (or don't know if you have 2FA enabled), then you can start the process here, and there are some help/faq pages.
Getting KeePass to Use the Password Database on Google Drive

- In KeePass, go to Main Menu → Tools → KeeAnywhere Settings...
- If a "Donate to KeeAnywhere" window appears, select "Don't Show this message again" and then press the "Close" button.
- In the KeeAnywhere Settings window...
- Go to the "Add..." dropdown and select Google Drive.
- Log in to your Google account.
- Press "OK" in the KeeAnywhere Settings window.
- In KeePass main window, do a Main Menu → File → Open → Open from Cloud Drive
- Select the appropriate account from drop-down at top, and then select your database file, and press okay.
Getting PC's Firefox And Chrome To Use Your Password Database

- Install Kee from the "Kee Extension" section of the Kee website or Mozilla's Kee addon page and/or Chrome's Kee web store page.
- Put KeePassRPC.plgx (also available from KeePass plugins page) in your KeePass plugins folder. That folder is probably "C:\Program Files (x86)\KeePass Password Safe 2\Plugins".
- I will later update with more details...
- You'll get a pop-up window from KeePass about how something wants to connect to KeePass. It'll have some instructions and probably a verification code.
- You'll also have a new browser tab that is asking for the verification code, so fill that in (or whatever the instructions say).
Installing and Using KeePass App on Android

- On your Android device, go to Google Play Store and install KeePass2Android.
- To open your password database, you can:
- Launch KeePass2Android, “open file”, “google drive”, and select your kdbx file on google drive
- OR, go to google drive (in the google drive app or web browser), then select your kdbx file, then choose to “open with” KeePass2Android.
Installing and Using KeePass App on iPhone/iOS
- Make sure the database file on google drive ends in “.kdbx.kbdx”
- On your iPhone, go to the App Store and install MiniKeePass
- If you have Google Drive app on your iPhone...
- go to the Google Drive App
- select the database file
- choose MiniKeePass from the “Open With” options
- Alternatively, I believe you can use the web-browser-interface of Google Drive
- Go to drive.google.com in your browser
- Navigate to the database file and select it
- Choose MiniKeePass from the “open with” options
- If that doesn’t work, try another browser (you probably have Safari and Chrome on your iPhone).
Some Very Brief Notes on Using KeePass

- Ctrl+b to copy the username to the clipboard.
- Ctrl+c to copy the password to the clipboard.
- Ctrl+v for the delicious Auto-Type feature (for a demo, see 5:18 mark of the youtube video discussed below)
- Ctrl+Alt+s to do the also delicious Global Auto-Type of Selected Entry (shortcut can be edited via Main Menu → Tools → Options → Integration).
Here's how I usually log in to my bank account:
- In KeePass, double-click the URL part of the bank account entry, which makes my browser load the bank login page in a new tab.
- Once the page is loaded enough (and the page is designed so the cursor starts at the username text field), I single-click the Auto-Type button, which fills in my credentials on the page and then submits them.
- Done. It only took a double-click and a single-click, faster than typing in my credentials, even if they were firmly memorized and dangerously short (single character password).
- In KeePass, double-click the URL part of the bank account entry, which makes my browser load the bank login page in a new tab.
- Once the page is loaded enough, I press Ctrl+Alt+s, which fills in my credentials on the page and then submits them.
- Done. It only took a double-click and a Ctrl+Alt+s, faster than typing in my credentials.
There are some good youtube videos on setting up and using KeePass. For instance, this video starts out with installing KeePass to a USB drive (which is different from what this post helps with) but also covers...
- 2:15 mark: creating a password database file
- 3:36 mark: password generation and creating entries
- 5:18 mark: using KeePass to Auto-Type both username and password into your browser (note that Firefox and Chrome extensions have even more convenient and quick ways of entering credentials)
- 5:50 mark: If you fill in the URL entry, KeePass can launch that webpage in your browser (also double-clicking on an entry's URL column launches the page in your default browser)
Customized Password Generation

I have another post for detailed discussion of password generation.
For passwords for your various accounts, use the password
generator and I would suggest at least as strong as 17 lowercase
letters, which would be strong but efficient to manually input on an iPhone or TV remote.
For your master password, you should probably do something like a six-word diceware passphrase, which is strong and memorable.
For
reference, I like to use a pattern (Password Generator
→ Settings → Generate using pattern) like "udl{15}" with random
permutation and excluding look-alike characters. The 'u' is for 1 upper case letter, 'd' for 1 digit, "l{15}" for 15 lower case letters. It's usually pretty quick/easy to modify such a
generated password to fit some site's requirements, like adding
punctuation. In fact, websites' punctuation requirements are so contradictory, automatically generating punctuation would cost you time rather than saving time.
 |
| The option highlighted in blue under the mouse cursor is how you open the Password Generator so you can create a customized password or a password profile that helps you generate customized passwords in the future. |
 |
| In the Password Generator, Settings tab, you can select "Generate using pattern", put in your pattern, and put a checkmark for "Randomly permute characters of password". Note: picture uses a slightly different pattern than the pattern I recommend these days. |
 |
| In the Advanced tab, you can put a checkmark for "Exclude look-alike characters". You can exclude additional characters if you use the "Exclude the following characters" text field. |
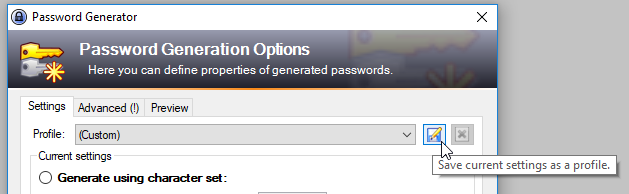 |
| Once done customizing password generation, you can save your settings as a profile by going back to the Settings tab and clicking the save icon (blue floppy disk with pencil to the right of the Profile drop-down). |
 |
| Type in a name for your new profile and then click the "OK" button to save the profile. |
 |
| Passwords for new entries can also be initially generated from this custom pattern if you save again (by clicking the blue floppy disk with pencil) and select "(Automatically generated passwords for new entries)" for the profile. |
 |
| Once you've saved a password profile, you can easily use that profile to generate passwords by clicking the password generation icon (a yellow key with an orange blip) and then selecting the profile. |
Supporting Credentials That You Use At Multiple Domains
If you are using the Kee browser extension, sometimes you'd like Kee to recognize that a set of credentials should be used for more than one web domain.For instance, imagine your Microsoft entry has the URL field set to "https://microsoft.com", therefore Kee uses your Microsoft credentials for the "microsoft.com" domain. The problem is you want Kee to also use your Microsoft credentials at "live.com" and "office.com" domains. The solution is to...
- Launch the "Edit Entry" dialog for your Microsoft entry.
- Go to the "Kee" tab
- Go to the "URLs" sub-tab.
- Make sure the "Domain" radio button is selected.
- Use the "Add" button to add "live.com" to the "Additional URLs" list. Repeat for "office.com".

Commercial Password Managers That Are Alternatives to KeePass

Often, commercially-supported password managers will have a free version for use on one device, but if you want to be able to sync across multiple devices, you'll have to pay. You might want to check out the details of several commercial password managers before choosing one.
- 1Password, which is possibly the best one. Currently (2019-Oct) there is a free 30-day trial, rather than a free version. I currently use 1Password.
- BitWarden, free multi-device sync support, open source
- Norton Identity Safe, I believe this one is free even if you want to sync across multiple devices.
- DashLane
- LastPass
See What Passwords Of Yours Bad Guys Might Already Know
The haveibeenpwned website will let you put in a username or email address, and then show you if that username or email address is known to be part of any data breaches. For instance, if you put in the username "alice", you'll see a list of breaches where the account associated with username "alice" was part of the breach. One such breach for "alice" is a Forbes breach where hackers got a hold of usernames, email addresses, passwords, and more.So, if you had an "alice" account with Forbes, you should assume that bad guys know what password you used at Forbes. You should make sure to change your Forbes account password, and also change your password at all accounts that used the same (or similar) password.
You should always use strong, unique passwords for every account. Password managers make this policy manageable, but even if you decide not to use a password manager, you should be aware of your greatest risks. Maybe the results of haveibeenpwned will be a wake up call to the risks of using the same password for multiple accounts.
I used Keepass for years before I found out about its best feature, Global Auto-Type (Ctrl+Alt+A). It looks at the window you're in and tries to find a password with a title that matches the window title, then fills in the corresponding username and password. If the window title doesn't make sense as the title for the Keepass entry, you can add specific "Target Windows" on the "Auto-Type" tab. Once it's set up, you rarely need to open the Keepass window, and don't have to bother with browser extensions to fill in your usernames and passwords. More info here: https://keepass.info/help/base/autotype.html#autoglobal
ReplyDeleteGood Grief Man!!! This was so detailed and easy for even a novice, like me, to understand. I'm soo thankful for people like you who will take the time to make such a detailed tutorial.
ReplyDeleteThank you, thank you.